Are you tired of relying on expensive professionals for appliance repairs? With the right guidance, you can save money and time by fixing common issues yourself. In this extensive guide, we’ll cover the essentials of DIY appliance repair, providing you with the confidence and knowledge to tackle various tasks.
Understanding Appliance Basics
Before diving into repairs, it’s crucial to understand how appliances function. Familiarize yourself with the following components:
- Electrical systems: Learn about circuits, wiring, and fuses.
- Mechanical systems: Understand gears, belts, and motors.
- Thermal systems: Know about heating elements, thermostats, and insulation.
Essential Tools for DIY Appliance Repair
Invest in a well-stocked toolkit to ensure you’re prepared for various repairs:
- Multimeter (for electrical measurements)
- Pliers and screwdrivers
- Wrenches and sockets
- Safety gear (gloves, goggles)
Common Appliance Issues and Solutions
Let’s explore frequent problems and DIY fixes for popular appliances:
Refrigerator Repair
- Faulty thermostat: Replace the thermostat or adjust its settings.
- Leaky seals: Inspect and replace worn-out door seals.
- Clogged drain: Clear the drain tube to prevent water accumulation.
Oven and Stove Repair
- Faulty heating elements: Replace damaged heating coils or elements.
- Igniter issues: Clean or replace faulty igniters.
- Oven temperature inaccuracies: Calibrate the oven thermometer.
Dishwasher Repair
- Leaks: Inspect and tighten loose connections, replacing worn-out gaskets if necessary.
- Poor cleaning performance: Check and clean filters, ensuring proper detergent usage.
- Noise issues: Balance the dishwasher or replace worn-out mounting components.
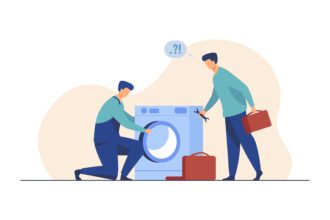
Washing Machine Repair
- Leaks: Identify and fix faulty hoses, seals, or pumps.
- Imbalance issues: Ensure proper loading and balance the machine.
- Faulty lid switches: Replace defective switches to restore functionality.
Dryer Repair
- Clogged vents: Clean lint buildup from vents and ducts.
- Heating element failures: Replace damaged heating coils or elements.
- Dryer drum issues: Inspect and replace worn-out rollers or bearings.
Safety Precautions and Best Practices
Remember to:
- Unplug appliances before repairs
- Wear protective gear (gloves, goggles)
- Follow manufacturer instructions
- Test appliances after repairs
Troubleshooting Techniques
Develop your problem-solving skills with these strategies:
- Identify symptoms: Understand the issue’s manifestation.
- Isolate components: Determine which part is faulty.
- Consult resources: Reference user manuals, online forums, or tutorials.
With this comprehensive guide, you’re now equipped to tackle various DIY appliance repairs. Remember to stay safe, follow best practices, and troubleshoot effectively. By doing so, you’ll save money, reduce waste, and develop a sense of accomplishment. Happy repairing!